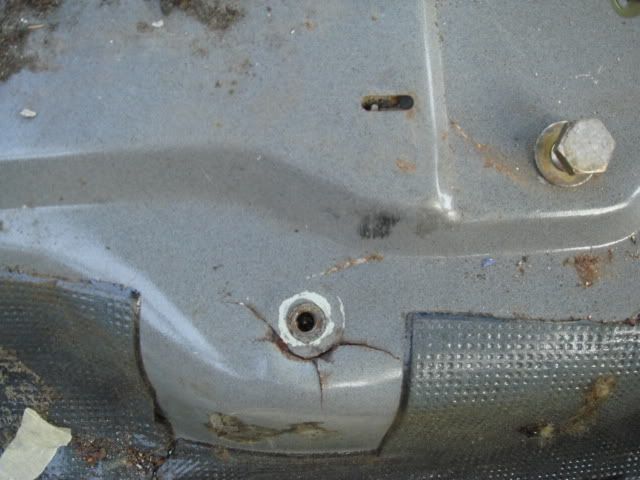
Integrales have weak shells and cracks in various places at the front are common, especially on the wider Evo models. You can try to strengthen it or simply add a cage.
Why do they crack?
Cracks are formed by the metal being regularly flexed, steel can be bent quite a lot before it starts to break, but your car will have seen a lot of flexing since it was made over 15yrs ago.
You have to remember that the basic shell was designed in the 70's for a small medium priced FWD hatchback with 1.3 engine. By the end of its run the power output had tripled and the weight of the engine, transmission and ancillaries had grown out of all proportion, still the basic shell remained.
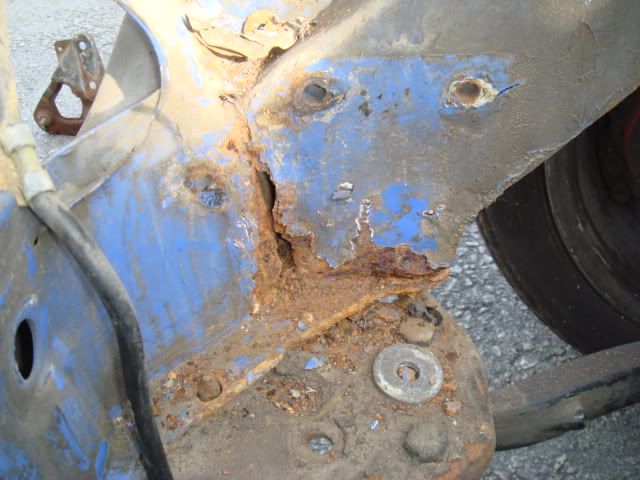
The heavy engine and transmission is hung out at the front which apart from making the car a bit 'understeery' means that it puts a lot of strain on the front part of the shell, the chassis rails or legs get a good work out. Support for the chassis rails comes in the form of the suspension arms below. The problem here is that they are fixed to the shell via rubber bushes which allow movement. If you were to replace these with solid bearings or brace around them then you would stop a lot of the movement and stress fractures on the legs themselves, you could however move the problem further back on the shell. Replacing rubber bushes with bearings will increase feedback from the car to the driver making it more enjoyable to drive, the suspension will be encouraged to do its thing too instead of the chassis flexing. The downside is that road noise in the cabin will be increased - they were made from rubber for this reason.
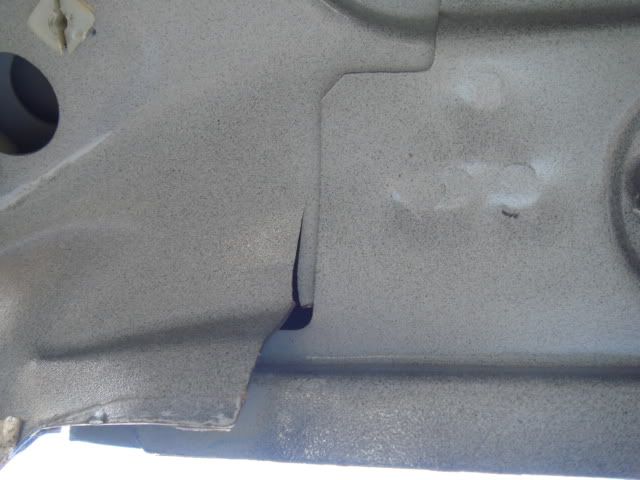
The floorpan beneath the front inner seat mountings crack too, this is basically the weight of the driver and passenger bouncing up and down, easily remedied by welding on strengthening plates.
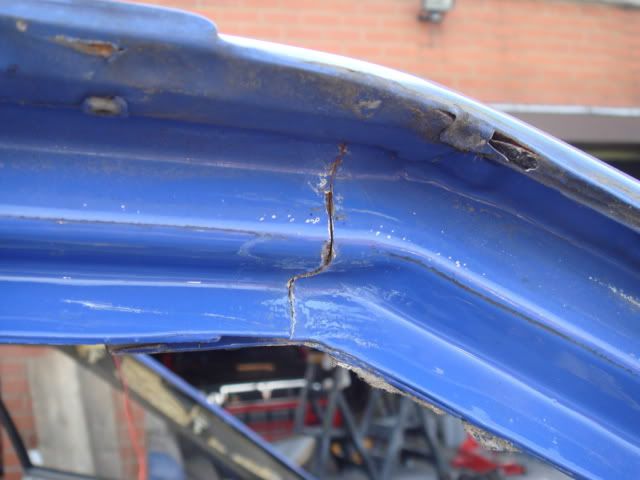
The cills on Evos can crack by the base of the A pillar, the front door surrounds also near where they meet the top of the A pillar. It is caused by the chassis flexing because of the engine/transmission bouncing up and down over the bumps in the road.
These are the main areas which crack, there are others.
I've known and had dealings with three cages: OMP, Sparco, Custom Cages.
OMP
Rated: 2/10
Just don't even go there, it has no diagonal bracing (front to rear), doesn't tie to the shell and is short on well, just everything... If you must buy this thing then at least make up some brackets to weld it to the shell at high level - top of A and B post, it doesn't do much if you don't apart from make the car difficult to get into.
Sparco
Rated: 9/10
Overall the best off the shelf package for those who expect to get what they pay for and don't want to pay for hidden extra materials/work. It is has lots of diagonal bracing, weld in brackets to tie it to the shell and is based on the Grp A cage which was very well thought out - well it bloody well should have been!
Custom Cages
Rated: 7/10
http://www.customcages.co.uk/Rollcage/LoadRollCage.castle?manufacturer=Lancia&model=Delta Integrale&type=Multipoint
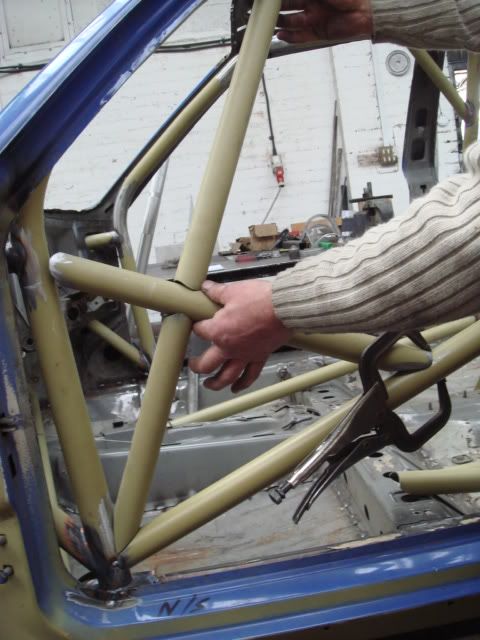
On the surface a very comprehensive cage with lots of tube, on fitting it you will find that not much of it actually fits. The cage features a diagonal bar which goes from the base of the A pillar, up through the bulkhead/wheelarch and meets the horizontal bar near where it fixes to the strut top. This is a very useful addition as it tackles the problem that integrales have in this area.
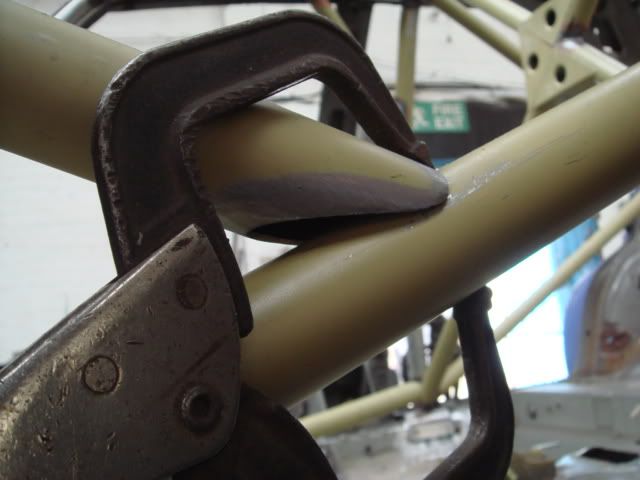
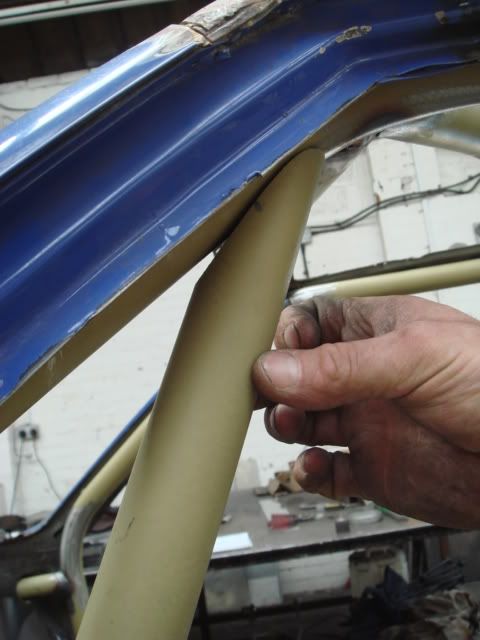
The A pillar tubes are bent to the wrong angle, a few other braces have the wrong angles cut on them or are short. If you buy this kit be prepared to re-bend some of the tube and order some more for the parts which don't fit. You will also have to make up some brackets to fix it to the shell at high level (A & B posts) as none are provided. It comes across as a cage which was originally designed and fitted to a crashed car, but persevere, add more tube, brackets and you will have a very good strong cage.
How do I come to these conclusions?
Well having a bit of common sense when just looking at the thing works wonders along with some easily learned structural knowledge, how braces do what they do and what forces are at work.
In the workshop we have a two post lift with four adjustable pads which sit under each of the jacking points, if a car has no cage or a poor cage it sags to fit the lift if the adjustable pads aren't wound up exactly equally. If you lift a car with a properly fitted good quality cage in this way it will rock from corner to corner.
An interesting read here on the CLS forum: http://www.lanciasport.com/forum/index.php?topic=1020.15

 Why do they crack?
Cracks are formed by the metal being regularly flexed, steel can be bent quite a lot before it starts to break, but your car will have seen a lot of flexing since it was made over 15yrs ago.
Why do they crack?
Cracks are formed by the metal being regularly flexed, steel can be bent quite a lot before it starts to break, but your car will have seen a lot of flexing since it was made over 15yrs ago.
 You have to remember that the basic shell was designed in the 70's for a small medium priced FWD hatchback with 1.3 engine. By the end of its run the power output had tripled and the weight of the engine, transmission and ancillaries had grown out of all proportion, still the basic shell remained.
The heavy engine and transmission is hung out at the front which apart from making the car a bit 'understeery' means that it puts a lot of strain on the front part of the shell, the chassis rails or legs get a good work out. Support for the chassis rails comes in the form of the suspension arms below. The problem here is that they are fixed to the shell via rubber bushes which allow movement. If you were to replace these with solid bearings or brace around them then you would stop a lot of the movement and stress fractures on the legs themselves, you could however move the problem further back on the shell. Replacing rubber bushes with bearings will increase feedback from the car to the driver making it more enjoyable to drive, the suspension will be encouraged to do its thing too instead of the chassis flexing. The downside is that road noise in the cabin will be increased - they were made from rubber for this reason.
You have to remember that the basic shell was designed in the 70's for a small medium priced FWD hatchback with 1.3 engine. By the end of its run the power output had tripled and the weight of the engine, transmission and ancillaries had grown out of all proportion, still the basic shell remained.
The heavy engine and transmission is hung out at the front which apart from making the car a bit 'understeery' means that it puts a lot of strain on the front part of the shell, the chassis rails or legs get a good work out. Support for the chassis rails comes in the form of the suspension arms below. The problem here is that they are fixed to the shell via rubber bushes which allow movement. If you were to replace these with solid bearings or brace around them then you would stop a lot of the movement and stress fractures on the legs themselves, you could however move the problem further back on the shell. Replacing rubber bushes with bearings will increase feedback from the car to the driver making it more enjoyable to drive, the suspension will be encouraged to do its thing too instead of the chassis flexing. The downside is that road noise in the cabin will be increased - they were made from rubber for this reason.
 The floorpan beneath the front inner seat mountings crack too, this is basically the weight of the driver and passenger bouncing up and down, easily remedied by welding on strengthening plates.
 The cills on Evos can crack by the base of the A pillar, the front door surrounds also near where they meet the top of the A pillar. It is caused by the chassis flexing because of the engine/transmission bouncing up and down over the bumps in the road.
These are the main areas which crack, there are others.
I've known and had dealings with three cages: OMP, Sparco, Custom Cages.
OMP
Rated: 2/10
Just don't even go there, it has no diagonal bracing (front to rear), doesn't tie to the shell and is short on well, just everything... If you must buy this thing then at least make up some brackets to weld it to the shell at high level - top of A and B post, it doesn't do much if you don't apart from make the car difficult to get into.
Sparco
Rated: 9/10
Overall the best off the shelf package for those who expect to get what they pay for and don't want to pay for hidden extra materials/work. It is has lots of diagonal bracing, weld in brackets to tie it to the shell and is based on the Grp A cage which was very well thought out - well it bloody well should have been!
Custom Cages
Rated: 7/10
http://www.customcages.co.uk/Rollcage/LoadRollCage.castle?manufacturer=Lancia&model=Delta Integrale&type=Multipoint
On the surface a very comprehensive cage with lots of tube, on fitting it you will find that not much of it actually fits. The cage features a diagonal bar which goes from the base of the A pillar, up through the bulkhead/wheelarch and meets the horizontal bar near where it fixes to the strut top. This is a very useful addition as it tackles the problem that integrales have in this area.
The cills on Evos can crack by the base of the A pillar, the front door surrounds also near where they meet the top of the A pillar. It is caused by the chassis flexing because of the engine/transmission bouncing up and down over the bumps in the road.
These are the main areas which crack, there are others.
I've known and had dealings with three cages: OMP, Sparco, Custom Cages.
OMP
Rated: 2/10
Just don't even go there, it has no diagonal bracing (front to rear), doesn't tie to the shell and is short on well, just everything... If you must buy this thing then at least make up some brackets to weld it to the shell at high level - top of A and B post, it doesn't do much if you don't apart from make the car difficult to get into.
Sparco
Rated: 9/10
Overall the best off the shelf package for those who expect to get what they pay for and don't want to pay for hidden extra materials/work. It is has lots of diagonal bracing, weld in brackets to tie it to the shell and is based on the Grp A cage which was very well thought out - well it bloody well should have been!
Custom Cages
Rated: 7/10
http://www.customcages.co.uk/Rollcage/LoadRollCage.castle?manufacturer=Lancia&model=Delta Integrale&type=Multipoint
On the surface a very comprehensive cage with lots of tube, on fitting it you will find that not much of it actually fits. The cage features a diagonal bar which goes from the base of the A pillar, up through the bulkhead/wheelarch and meets the horizontal bar near where it fixes to the strut top. This is a very useful addition as it tackles the problem that integrales have in this area.
 The A pillar tubes are bent to the wrong angle, a few other braces have the wrong angles cut on them or are short. If you buy this kit be prepared to re-bend some of the tube and order some more for the parts which don't fit. You will also have to make up some brackets to fix it to the shell at high level (A & B posts) as none are provided. It comes across as a cage which was originally designed and fitted to a crashed car, but persevere, add more tube, brackets and you will have a very good strong cage.

 How do I come to these conclusions?
Well having a bit of common sense when just looking at the thing works wonders along with some easily learned structural knowledge, how braces do what they do and what forces are at work.
In the workshop we have a two post lift with four adjustable pads which sit under each of the jacking points, if a car has no cage or a poor cage it sags to fit the lift if the adjustable pads aren't wound up exactly equally. If you lift a car with a properly fitted good quality cage in this way it will rock from corner to corner.
An interesting read here on the CLS forum: http://www.lanciasport.com/forum/index.php?topic=1020.15
How do I come to these conclusions?
Well having a bit of common sense when just looking at the thing works wonders along with some easily learned structural knowledge, how braces do what they do and what forces are at work.
In the workshop we have a two post lift with four adjustable pads which sit under each of the jacking points, if a car has no cage or a poor cage it sags to fit the lift if the adjustable pads aren't wound up exactly equally. If you lift a car with a properly fitted good quality cage in this way it will rock from corner to corner.
An interesting read here on the CLS forum: http://www.lanciasport.com/forum/index.php?topic=1020.15